
Here’s everything that you need to do to start using Amazon S3 with your WordPress site:
It should probably go without saying, but I highly recommend that you back up your site before you begin this process.
Step 1: Install and activate WP Offload Media Lite plugin
You’re not really going to do anything in the plugin’s interface quite yet. But before you jump into the Amazon S3 (AWS S3) interface, it’s a good idea to make sure that you have the plugin installed and activated on your site.
When you activate WP Offload Media Lite, it will prompt you to Define your AWS keys.
Over the next few steps, you’ll follow the process to actually generate those keys.
Step 2: Create a new bucket at Amazon S3
If you haven’t already created a free Amazon Web Services account, go ahead and do that now.
Once you create your account, either navigate to the Amazon S3 section from inside your AWS account dashboard or click here to go straight to S3.
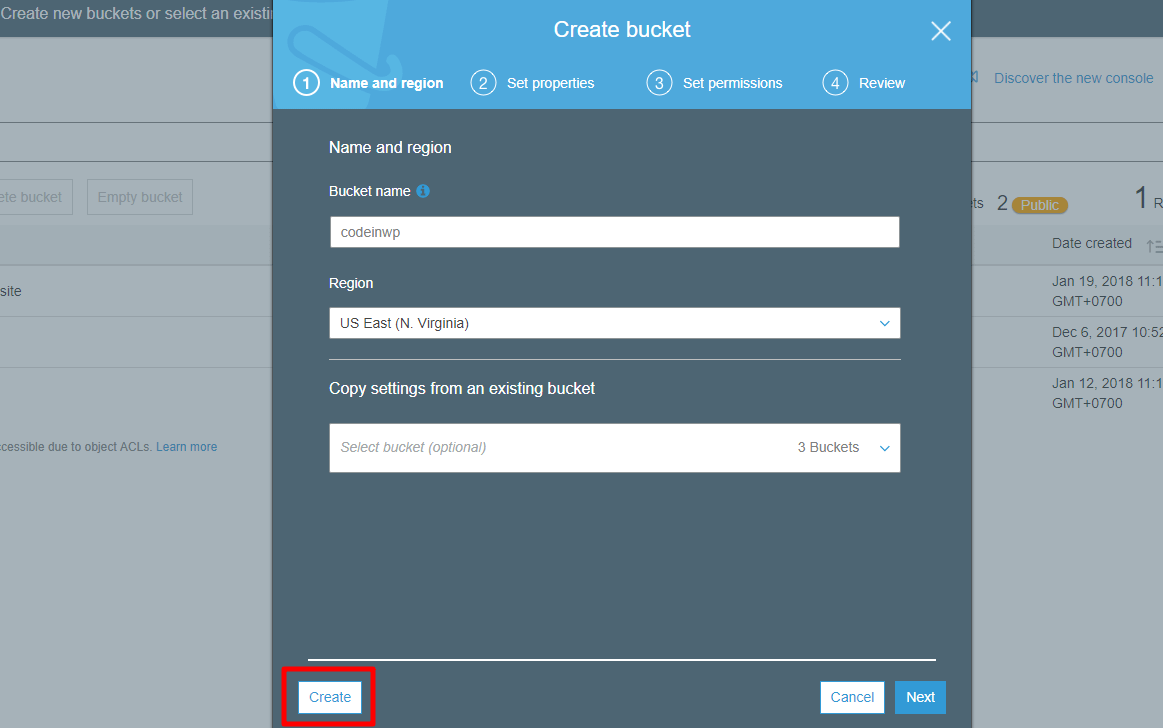
In the S3 interface, click the button to Create bucket:
On the popup interface:
Give your bucket a name
Choose a Region (make this as close to your target audience as possible, especially if you’re not planning to use a CDN)
Click Create
Step 3: Set your bucket policy
In order for everything to function properly, you need to make your S3 bucket public. To do that, you use something called a bucket policy.
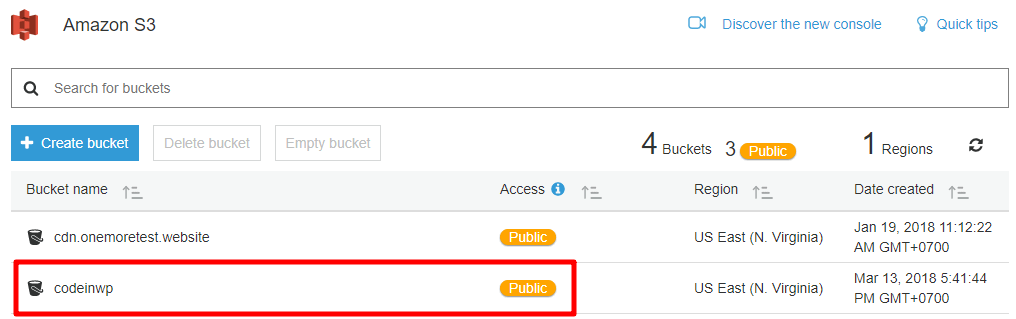
To add a bucket policy, click on your bucket in the S3 interface:
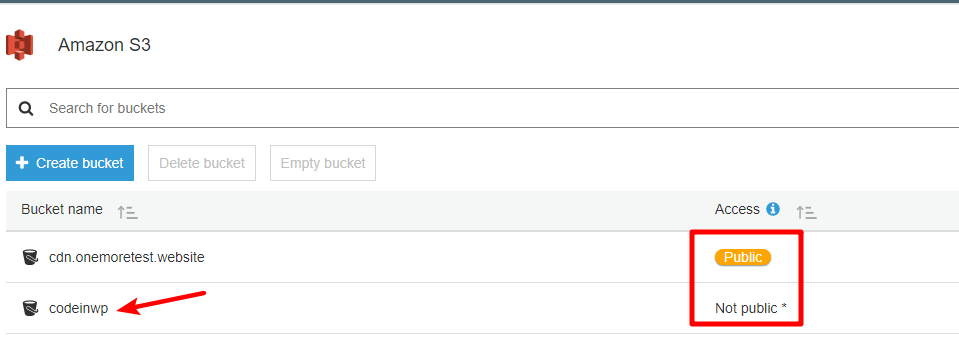
In the screenshot above, you can see that my other bucket is already public, while the codeinwp bucket that I created for this tutorial is marked as Not public. After this step, you want that Public indicator for your bucket as well.
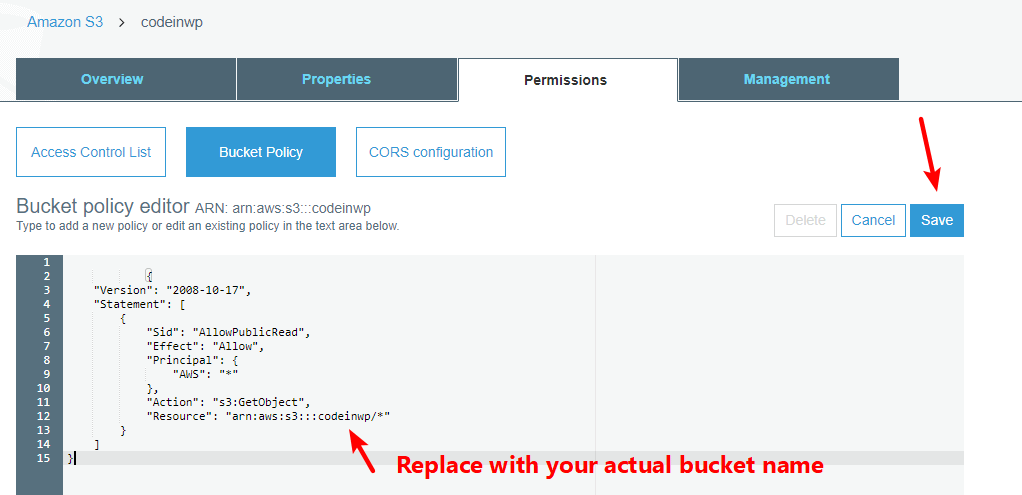
On the next screen, click on the Permissions tab and then select Bucket Policy:
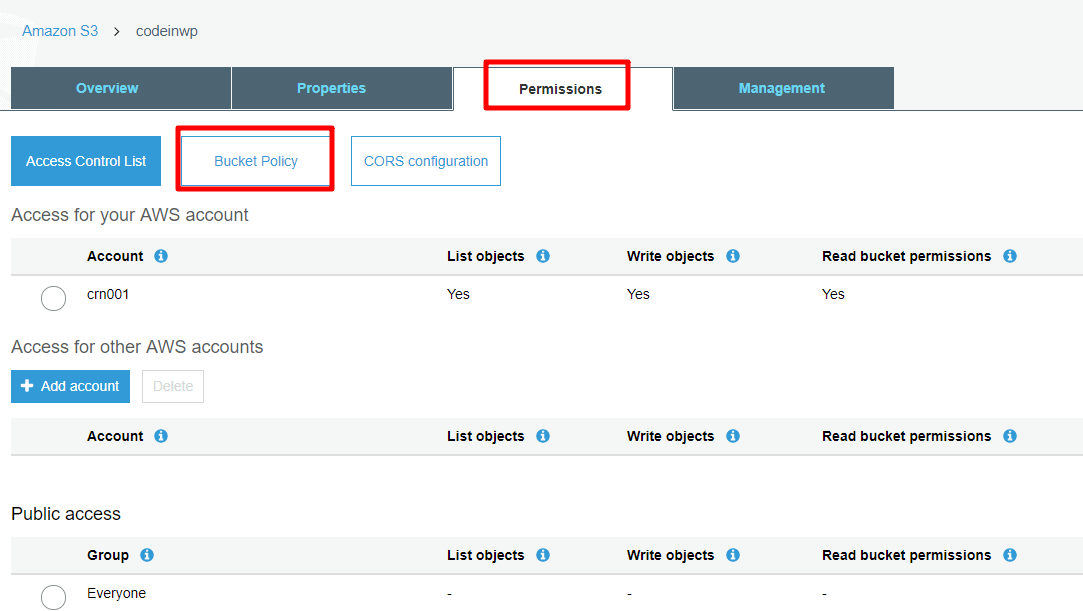
You should see a JSON code editor. Paste in the below snippet and save your changes.
Make sure to replace codeinwp with the actual name of your bucket:
{
	"Version": "2008-10-17",
	"Statement": [
	{
		"Sid": "AllowPublicRead",
		"Effect": "Allow",
		"Principal": {
			"AWS": "*"
		},
		"Action": "s3:GetObject",
		"Resource": "arn:aws:s3:::codeinwp/*"
	}
	]
}
Once you save your changes, you should see your bucket marked as Public in the Amazon S3 dashboard:
Step 4: Create an IAM user and policy
Now, you need to create something called an IAM user. This user basically allows the plugin to manage your S3 bucket, which is essential if you want the plugin to automatically add the files that you upload to WordPress.
This is the most complicated part of the entire process, so I’m going to break everything down step-by-step and use plenty of screenshots.
Once you finish this process it will give you the AWS keys that the plugin asks for and you’re pretty much finished.
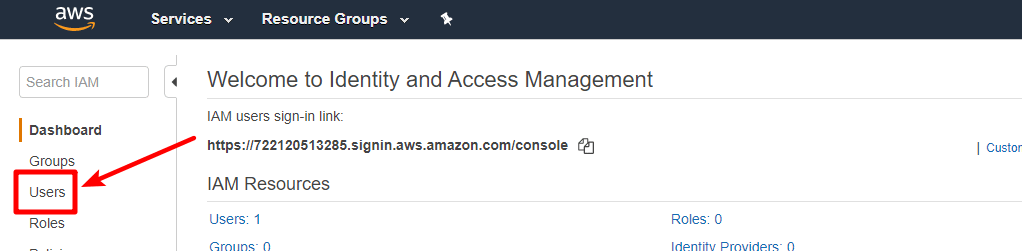
To create your IAM user, go to the IAM area in your AWS account.
From there, select the Users tab:
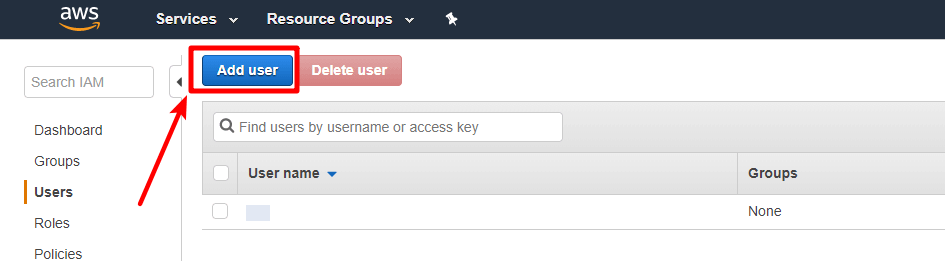
Then, click on Add user at the top:
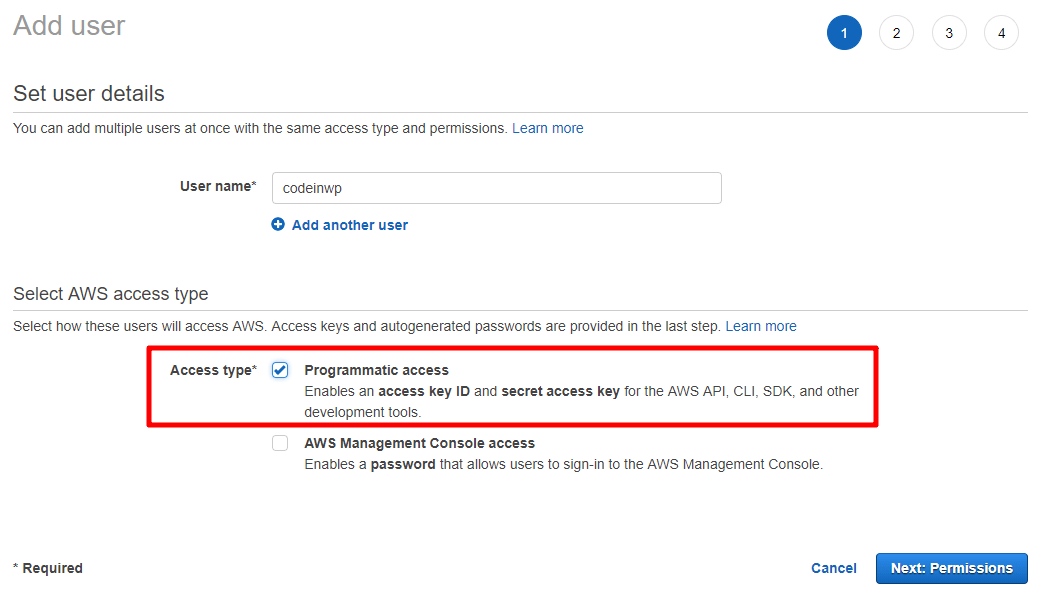
In the Add user interface, you need to give your user a name. Then, make sure to select Programmatic access under Access type. Once you’ve done that, click Next: Permissions:
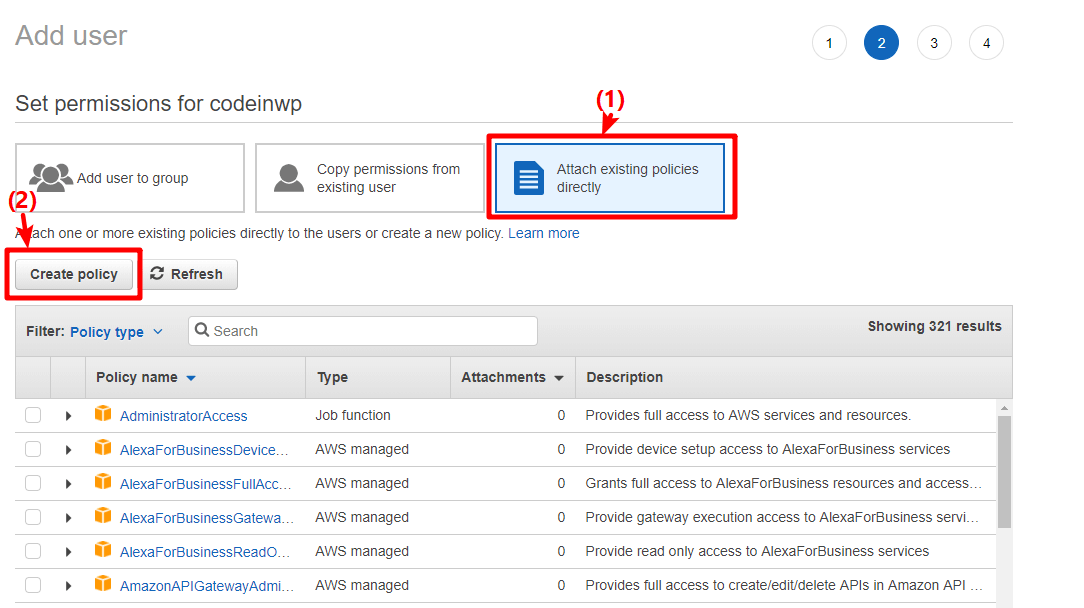
On the next page, select the Attach existing policies directly tab and select Create policy:
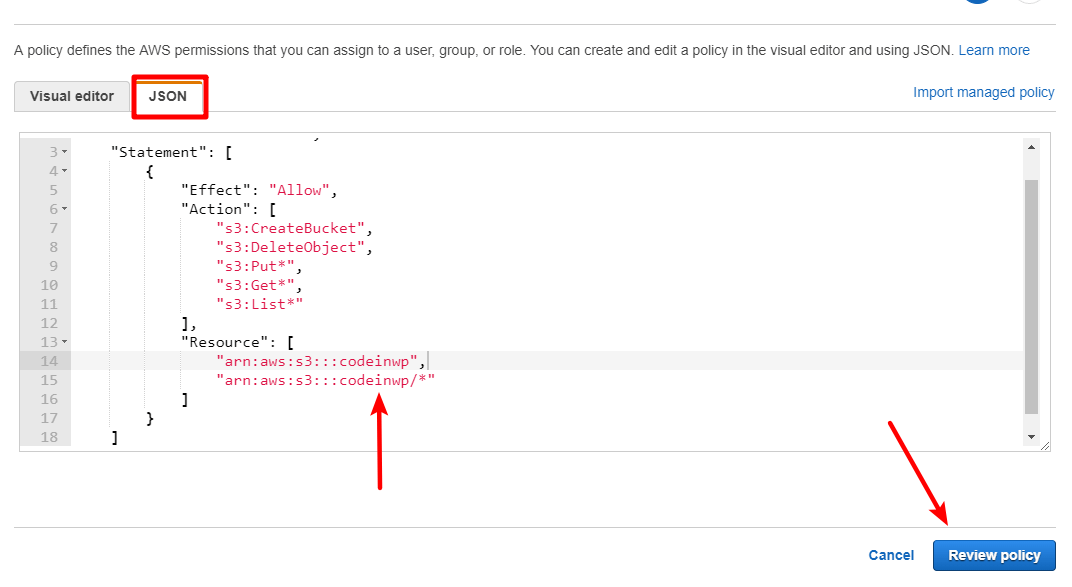
That will launch a new window. In that new window, go to the JSON tab and paste in this code snippet:
{
	"Version": "2012-10-17",
	"Statement": [
	{
		"Effect": "Allow",
		"Action": [
			"s3:CreateBucket",
			"s3:DeleteObject",
			"s3:Put*",
			"s3:Get*",
			"s3:List*"
		],
		"Resource": [
			"arn:aws:s3:::codeinwp",
			"arn:aws:s3:::codeinwp/*"
		]
	}
	]
}
Make sure to replace the two instances of codeinwp with the actual name of your Amazon S3 bucket.
Then, click Review policy at the bottom:
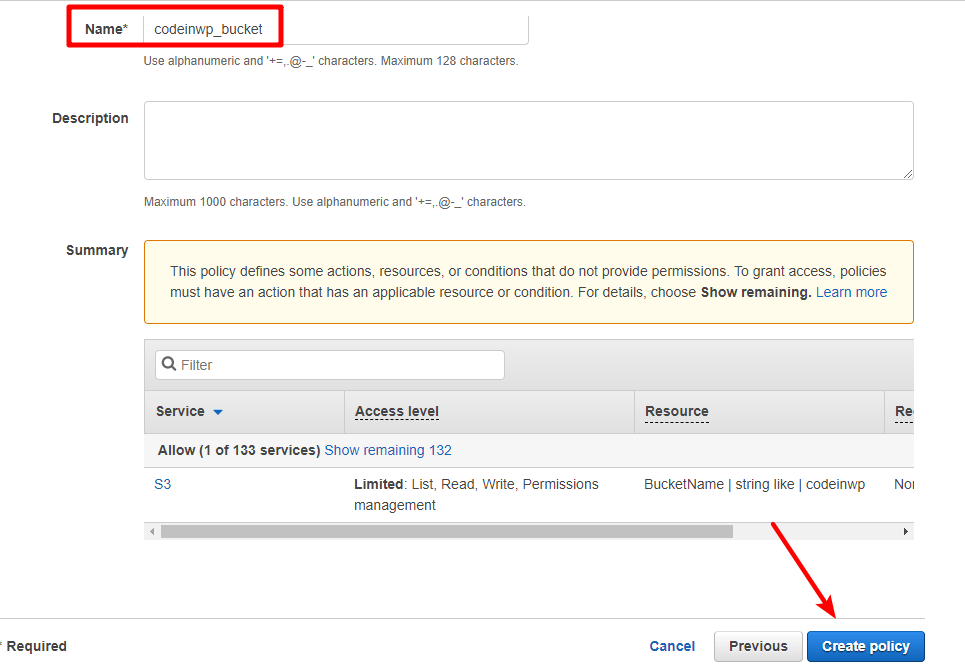
On the next screen, give it a name and then click Create policy:
Now:
Go back to the IAM Add User tab from before
Click Refresh
Select the policy that you just created from the list (you can search for it by name to save time)
Click Next: Review

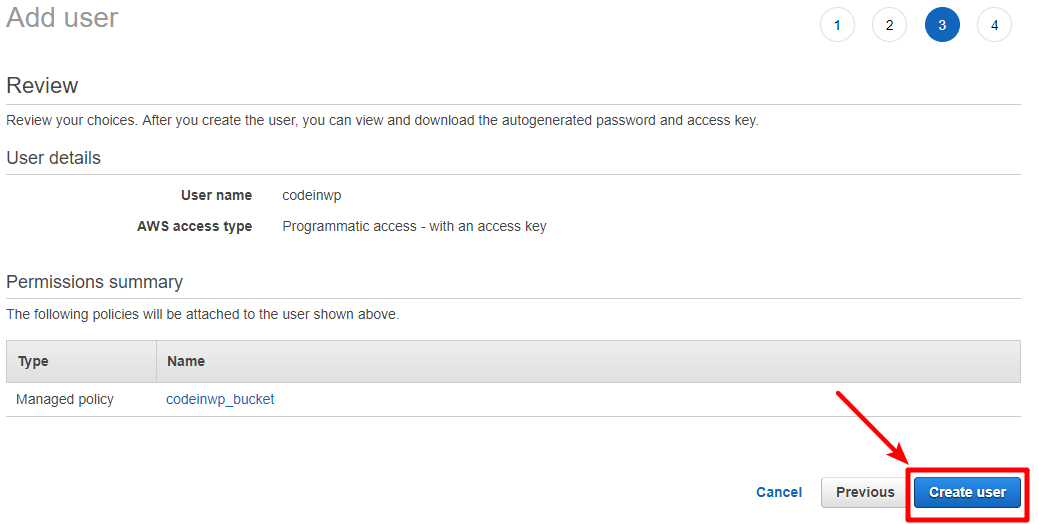
On the next screen, click Create user:
On the next screen, you should see:
Access key ID
Secret access key (you’ll need to click Show to actually see the secret key)
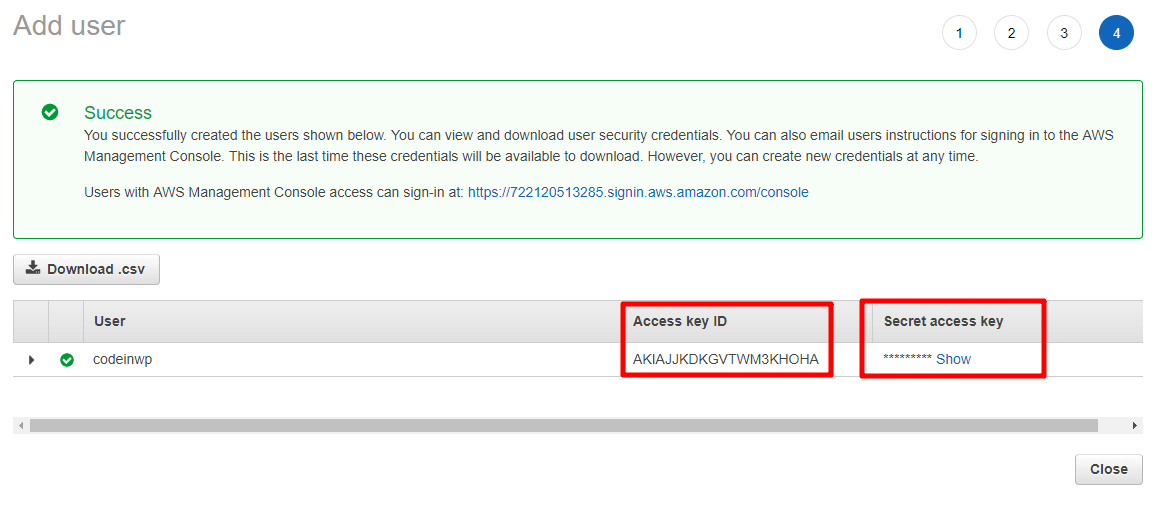
Keep both these values handy because you’re going to need them in the next step.
Step 5: Add access keys to wp-config.php file
Phew! You’re officially done with the AWS interface.
Now, you can head back to the friendly confines of your WordPress site.
Specifically, you need to edit your wp-config.php file. You can either do this via FTP or via cPanel file manager.
Add the code snippet below to your wp-config.php file, making sure to replace the asterisks with your actual keys from the previous step:
define( 'AS3CF_AWS_ACCESS_KEY_ID', '********************' );
define( 'AS3CF_AWS_SECRET_ACCESS_KEY', '*********************' );
Here’s how it looks in my site’s wp-config.php file:
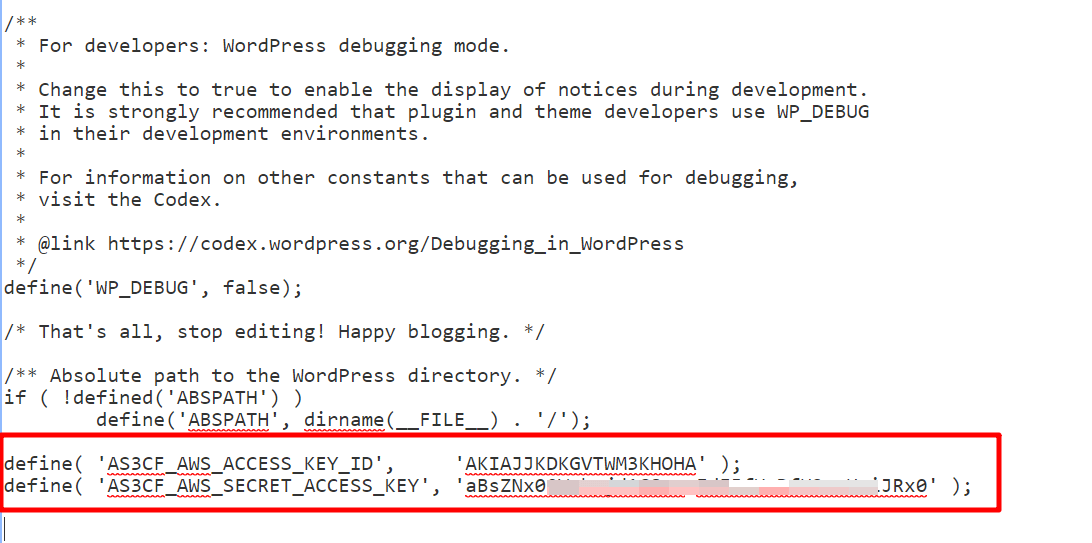
Make sure to save your changes.
Step 6: Select S3 bucket in WP Offload Media Lite settings
Now, go to Settings → Offload S3.
Type your S3 bucket’s name in the What bucket would you like to use? field and click Save Bucket:
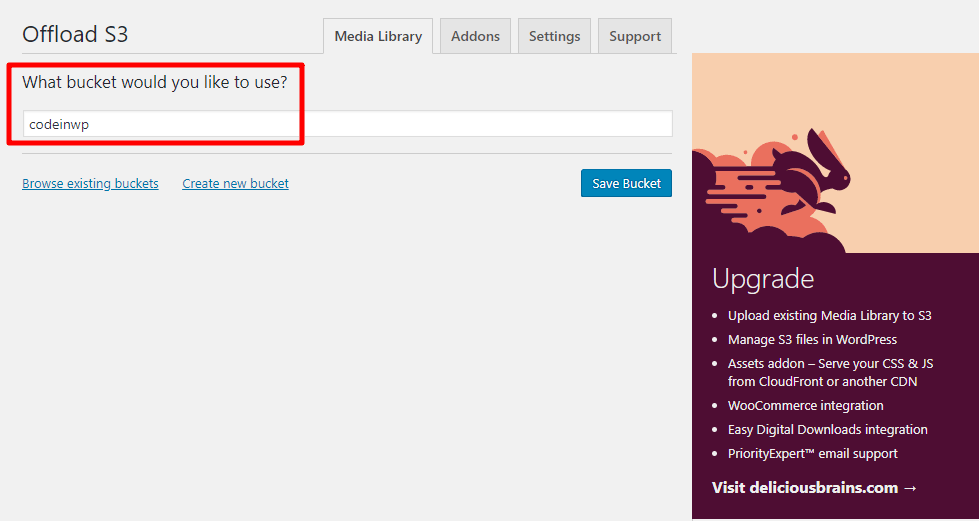
Once you save your changes, you should see the full plugin’s interface:
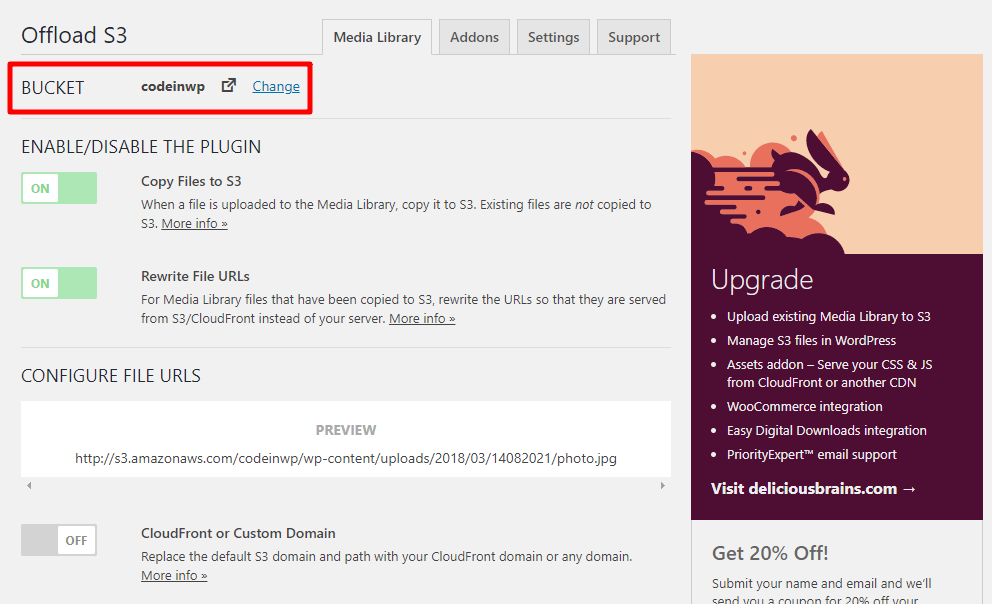
Note – because of how I had you set up the IAM user policy, the buttons to Browse existing buckets or Create new bucket will not work. This is actually intentional as it’s more secure.
If you don’t like sacrificing this functionality for security, you can change the IAM user policy to the policy outlined here. But, as you’ll see in that same article, Delicious Brains recommends the method that I used as a more secure approach in the BUCKET RESTRICTIONS section.
Step 7: Configure Offload S3 settings (if desired)
At this point, you’re pretty much fully set up. Any new files that you upload will automatically be offloaded to Amazon S3. Additionally, the plugin will automatically rewrite the file URLs for those files so that the file is served from Amazon S3 instead of your server.
You can test this by uploading a new media file and looking at the source code when you insert it:
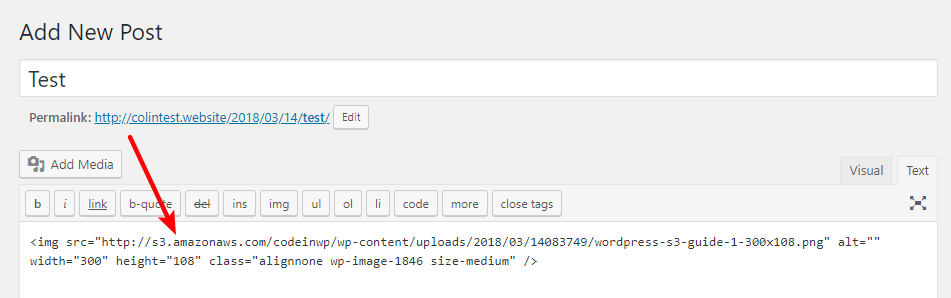
If you want the plugin to upload existing files to Amazon S3, though, you’ll need the premium version.
If you want to adjust any of the plugin’s functionality, you can make changes here. But for most situations, the default settings should be just fine.